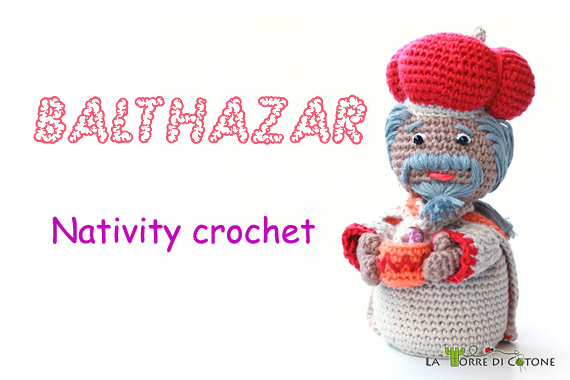
Balthazar, the first wise man of my nativity crochet.
[quote]Before starting, I ask you to follow my Facebook Page and share the nativity crochet patterns with your friends. Thank you! ![]()
Remember to check the head article to see if new patterns have being addeed and to see which colors you need to buy to complete the entire nativity. Here we go!
Attention: you may find some translation mistakes here and there. I’m so sorry for them! Please, if you find some just leave a message below and I’ll fix them. Thank you![/quote]
Abbreviations
ch- chain
sc – single crochet
dc – double crochet
inc – increase
dec – decrease
Body, harms and head
Work the body, arms and head as explained in the basic pieces , using tan color for the skin and the wheat for clothes.
Explanations sleeves
To start the work you will make a circle from chains that will form the basis of the sleeve. At the end of the work, the arm will be put in the sleeve and then sewn to the body. I suggest making the chains with a larger crochet hook, number 3 or 3.5, to avoid over-tightening the work and creating a balloon effect. After making the chains, continue working with the usual hook ( 2.5). Work in the round, but each round is closed (not working in a spiral).
Round 1: leave at least 15 cm of yarn free so that you are able to sew the sleeves to the body ,with the wheat color work 11 ch, slip stitch into the first ch to form a circle.
Lap 2: ch 2 (the chains do not count), 10 dc in the circle. Close the round.
Lap 3: ch 2 (the chains do not count),1 inc in first dc, 1 dc in each of remaining 9 stitches. Close the round.
Round 4: ch 2 (the chains do not count), 1 inc in first dc, 1dc in each of remaining 10 stitches. Close the round.
Lap 5: ch 2 (the chains do not count), 1 inc, 1dc in each of remaining 11 stitches. Close the round.
Lap 6: with the red make a border by working a row of sc’s Fasten off and cut thread, weave in end
Cape
The pattern below is not worked in circles. It runs from the neck and down to the foot along the edge, working the coat vertically.
Row 1: with the color orange , make 28 ch with a slightly larger hook, as explained in the diagram for the sleeves.
Row 2: ch 2 ( the chains do not count), 26 dc across. Turn the work.
Row 3: ch 2 ( the chains do not count), 1sc in each of next 16 dc, 1sc in next 4. leave the final stitches unworked and turn
Row 4: ch 1 ( the chains do not count), 4 sc, 16 dc acorss. Turn the work.
Rows 5-6: ch 2 ( the chains do not count), 20 dc across. Turn the work.
Row 7: ch 2 ( the chains do not count ), 16 dc, sc 4. Turn the work.
Row 8: ch 1 ( the chains do not count), 4 sc, 16 dc. Turn the work.
Rows 9-10: ch 2 ( the chains do not count), 20 dc. Turn the work.
Row 11: ch 2 ( the chains do not count), 16 dc, sc 4, chain 8. Turn the work.
Row 12: Sc in third chain from hook and in the next 5 chain spaces then continue to work another 20 dc in the previous line. Fasten off and cut the thread.
With rope colour work a row of sc’s around all edges of cape.
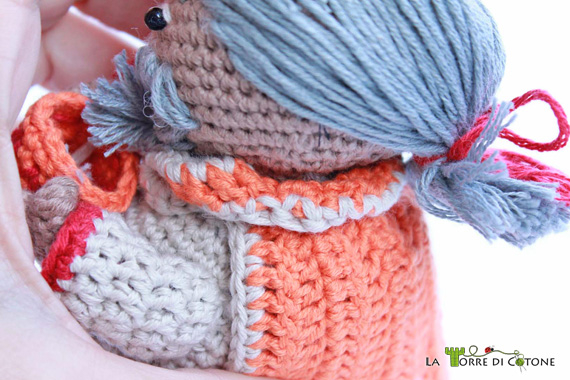
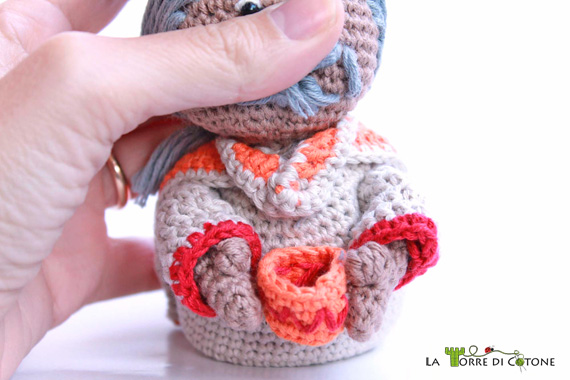
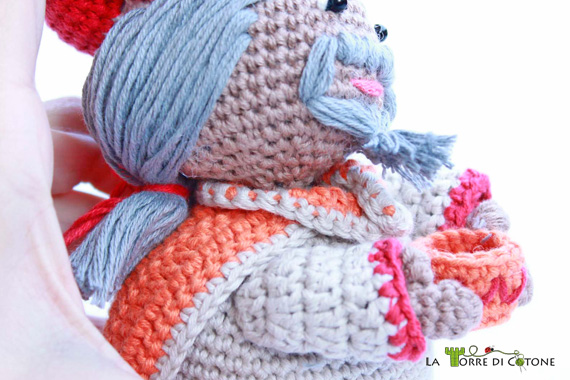
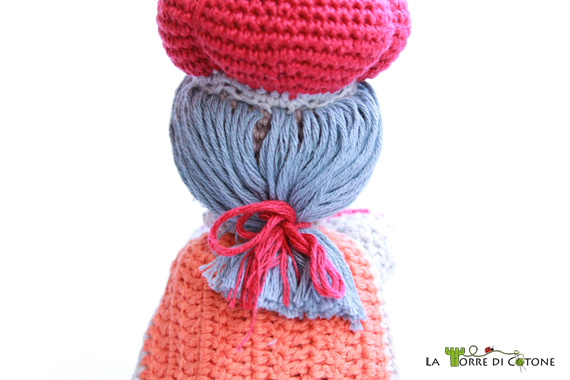
Place the cape on the shoulders of Baldassarre. The part along the neck must be turned to form a collar (see photo) so that the mantle is flush with the base. Then sew to the body at the point where the two edges of the neck are joined.
Hat
To start the hat you will work chains and slip stitch to form a closed circle that will form the base of the hat. At the end of the work, this side is sewn to the head, leave at least 25-30 inches of yarn before making chains. I suggest making the chains with a crochet hook bigger, number 3 or 3.5, to avoid overtightening when working the stitches, this will help keep the base of the hat straight. Once you have finished the chains, continue working with your usual crochet hook ( 2.5). Worked in the round, spiral.
Round 1: leaving at least 25-30 cm of yarn free to be able to sew the hat to the head , with the color wheat work 41 ch, close to form a circle with a slip stitch first ch.
Lap 2: 40 sc, close the round and cut the thread.
Lap 3: with the color red and just working the front loops , (1 inc, 4 sc) repeat to the end.
Round 4: working through both loops , (1 inc, 5 sc) repeat to the end.
Lap 5: (1 inc, 6 sc) repeat to the end.
Laps 6-8: work sc in each stitch around
Lap 9: (1 dec, 6 sc) repeat to the end.
Lap 10: work sc in each stitch around
Lap 11: (1 dec, 5 sc) repeat to the end.
Lap 12: work sc in each stitch around
Lap 13: (1 dim, 4 bp) to the end.
Lap 14: work sc in each stitch around
Lap 15: (1 dec, 3 sc) repeat to the end.
Lap 16: (dec 1, 2 sc) repeat to the end.
Lap 17: (dec1, 2 sc) to the end.
Lap 18: dec around.
Close the final stitches with the aid of the needle, leave a length of yarn rather long (about 50 cm or more). Start sewing the base of hat onto the character’s head, when there are about 6-7 chain spaces left before the end, stuff, then finish sewing.
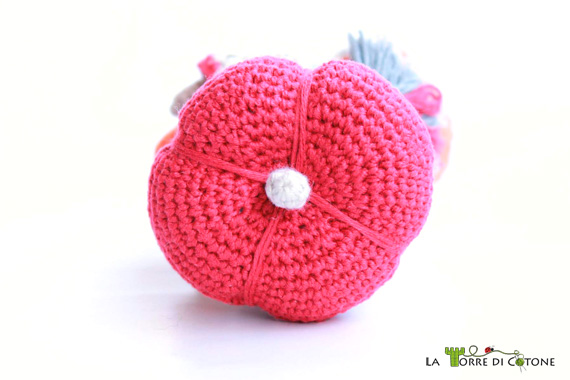
Now, taking the long red piece of red yarn with the help of the needle insert the yarn in the center of the hat and bring it out at the base, at the meeting point between the color red and the color rope. Then pull the thread lightly and let it fall within the center. Repeat step in the opposite side and then divide the two segments just made into two more segments, to divide into the four pieces. Firmly secure the yarn with a knot in his hat and weave in the excess thread.
To create the decorative picot at the center of the hat, you work in a magic ring, 5 rows of 6 sc. Then sew it to the center of the hat.
Thanks Rachel Jones for translating the pattern!

